Tired of being left behind on uphills? Ready to adopt a smooth, elegant stroke that is both fast and powerful? If so, here's an opportunity to piece that dream stroke together one component at a time. Practice just one of these tips each time you skate this summer. I recommend you start with the first, which is the easiest. You'll experience impressive improvements from each tip, so just imagine the results when you can incorporate every part into every stroke!
Note: If poor balance prevents you from working on these tips, be sure to read Dan's article, Put a Little Balance in Your Life.
- Get low -- Bend your support leg close to 90 degrees while your pushing leg is at work. That makes it possible to keep the wheels pushing across a longer distance, which adds power and speed. On the gliding foot, be sure to keep your nose, knee and toes lined up one over the other to maximize the push.
- No toe-flicking -- For the entire length of each stroke, keep all 4 (or 5) wheels of the pushing skate in contact with the pavement, concentrating the most pressure on the heel wheel. If you lift the back wheels before the end of your stroke, you lose both power and friction.
- Push to the side, not back -- A side-directed push results in forward momentum (Don't ask me how!) Tip #2 is easy if you do as speedskaters do and imagine you are pushing the right heel toward 2 o'clock and the left heel toward 10 o'clock. Yes, that's more forward than lateral, but the attempt is what results in 3 o'clock and 9 o'clock strokes. To me, it feels like I'm trying to paint a giant handlebar mustache with my heel wheels.
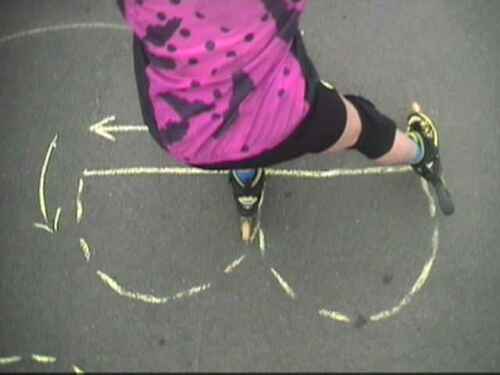
- Polish your swizzles -- Swizzle practice (making figure eights with both skates in constant pavement contact) is one of the best ways to get used to pushing with the heels and pushing laterally. Be assertive: listen for a slight scrubbing sound from your heel wheels at that moment of greatest force when you steer your toes inward. Then sink to a 90-degree knee bend when both skates are under your hips to regroup for another forceful push. Enjoy the fitness benefits while you're at it!
- Straighten your knee -- A stroke is incomplete if your knee is still bent when you lift it off the pavement for recovery. This could lose you several inches of contact with the pavement, which means lost power and efficiency.
- Slow your stroke tempo -- If the previous tips haven't forced you into less strokes per minute, it's time to focus on longer strokes and glides. My favorite game for this is to skate behind somebody and try to match their speed with half the number of strokes. This practice makes a good test for what you've learned so far this summer!
- Make Air D's -- To conserve energy, keep your wheels close to the pavement as you bring back (recover) your skate at the end of the stroke. While you trace a sideways D with your toe wheel, your knee follows the same path higher up. The knee comes in behind the support leg so close that you brush it as you move the skate ahead for the set-down.
- Fine tune your set-down -- Put your skate back on the pavement slightly ahead of you, with the wheels parallel to the direction of travel, rather than angled which deflects your speed. Land on the "tops" or center edges, not on the inside wheel edges. Later, once your stroke is powerful enough, try landing that skate beyond your center line of travel and touching down on the outside edges. This is the classic component of the Stride 3 or "power stride" taught by IISA-certified instructors. Try learning it on just one side at first, skating along a long painted line to gauge your set-down placements.
- Push with your hip -- By fully extending your pushing leg from both the hip and knee joints at the end of each stroke, you access power stored in some of your largest muscle groups. Just try unkinking at the hip when you finish each stroke.
- Let gravity help -- You can use gravity to aid in stroke efficiency. At the end of each glide, when your body is aligned nose-knee-toes over the support leg, delay set-down of the recovered skate while you let your support leg begin the a new push. As your weight begins its shift toward the recovered skate, you feel a slight "fall" just before before it touches down to catch you. That falling feeling is your body using gravity to add more power to what your muscles give. You want each set down to make a loud "clomp" for this drill. Make sure you're still making lateral pushes throughout.
And here's my bonus Zen tip: On a long fitness or training skate when exhaustion begins to weaken your will and technique, "relax and allow" the discomfort without obsessing, which is sure to make you more miserable and less mobile. Instead, experience each stroke and each inhalation as a new one (be here now) knowing the pain will end in due time.
Monday, July 9, 2012
Technique: Increase Your Pushing Power By Liz Miller
http://www.getrolling.com/orbit/10powertips.html
Subscribe to:
Post Comments (Atom)

No comments:
Post a Comment